Microsoft 365
In this section you will find a tutorial on how to create a resource in Microsoft 365 and how to connect a Tapirx device to the calendar of this resource.
Create resource in Microsoft 365
- Sign in to https://www.office.com/ with your Account Manager or Global Admin account credentials
- Click on the Admin icon within the Microsoft Office home screen
- Select Resources -> Rooms & equipment in Microsoft 365 admin center menu
- Click Add and create meeting room
Create delegated user
- Select Users -> Active users in Microsoft 365 admin center menu
- Click Add a user and create standard user. Typically the user is named "Tapirx Owner"
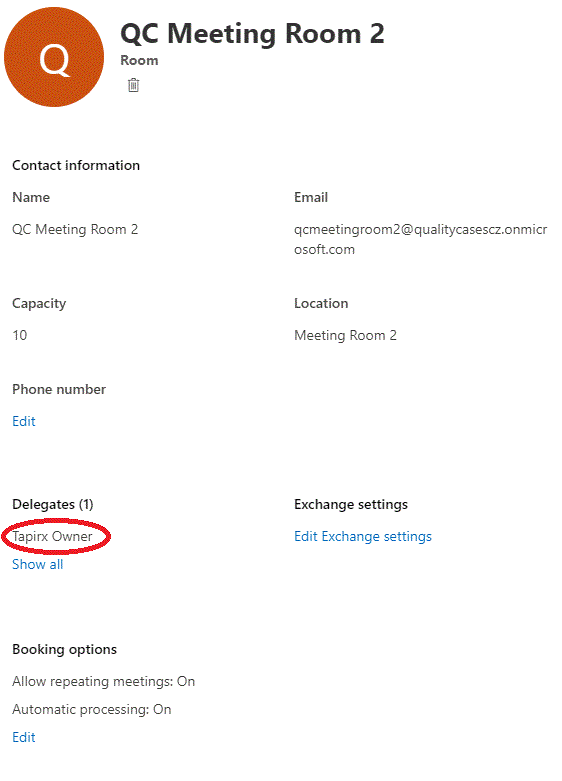
Add delegated user to meeting room
- Go back to Resources -> Rooms & equipment in Microsoft 365 admin center menu
- Click on the meeting room you want to connect with a Tapirx device
- Add the delegated user you have created
Allow access to Tapirx device in our client portal
It is a good idea to allow access in another browser or incognito window so the Microsoft 365 accounts do not collide.
Log in to client admin
- Log in to the user area with your Client admin credentials here
- Click on "Client admin" link in the menu
- Select "Allow access to calendars"
- Click "Allow access"
- Sign in with Microsoft 365 Delegated user credentials
- Confirm access for Tapirx
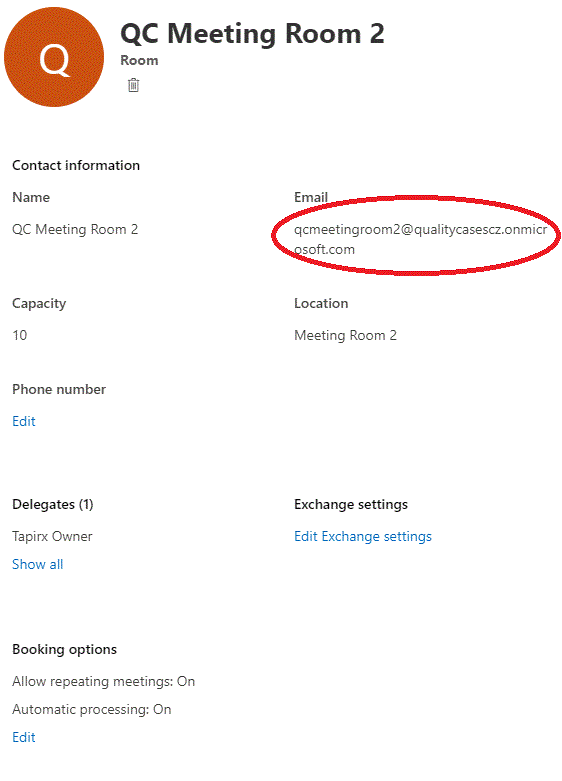
Assign Microsoft 365 resource email to Tapirx resource
You will need an Microsoft 365 resource email which can be found in Resources -> Rooms & equipment in Microsoft 365 admin center menu.
- In your Tapirx client admin click on "Resources"
- Choose resource
- Click on "Menu"
- Click on "Connect to calendar"
- Insert Microsoft 365 resource email
Assign device to resource
- Click on the "Client admin" link in menu
- Click on "Device list"
- Select Menu -> Settings -> Resource
Troubleshooting
Calendar shows organizer's name instead of event subject
Please refer to https://docs.microsoft.com. Or contact us for support.
Back